
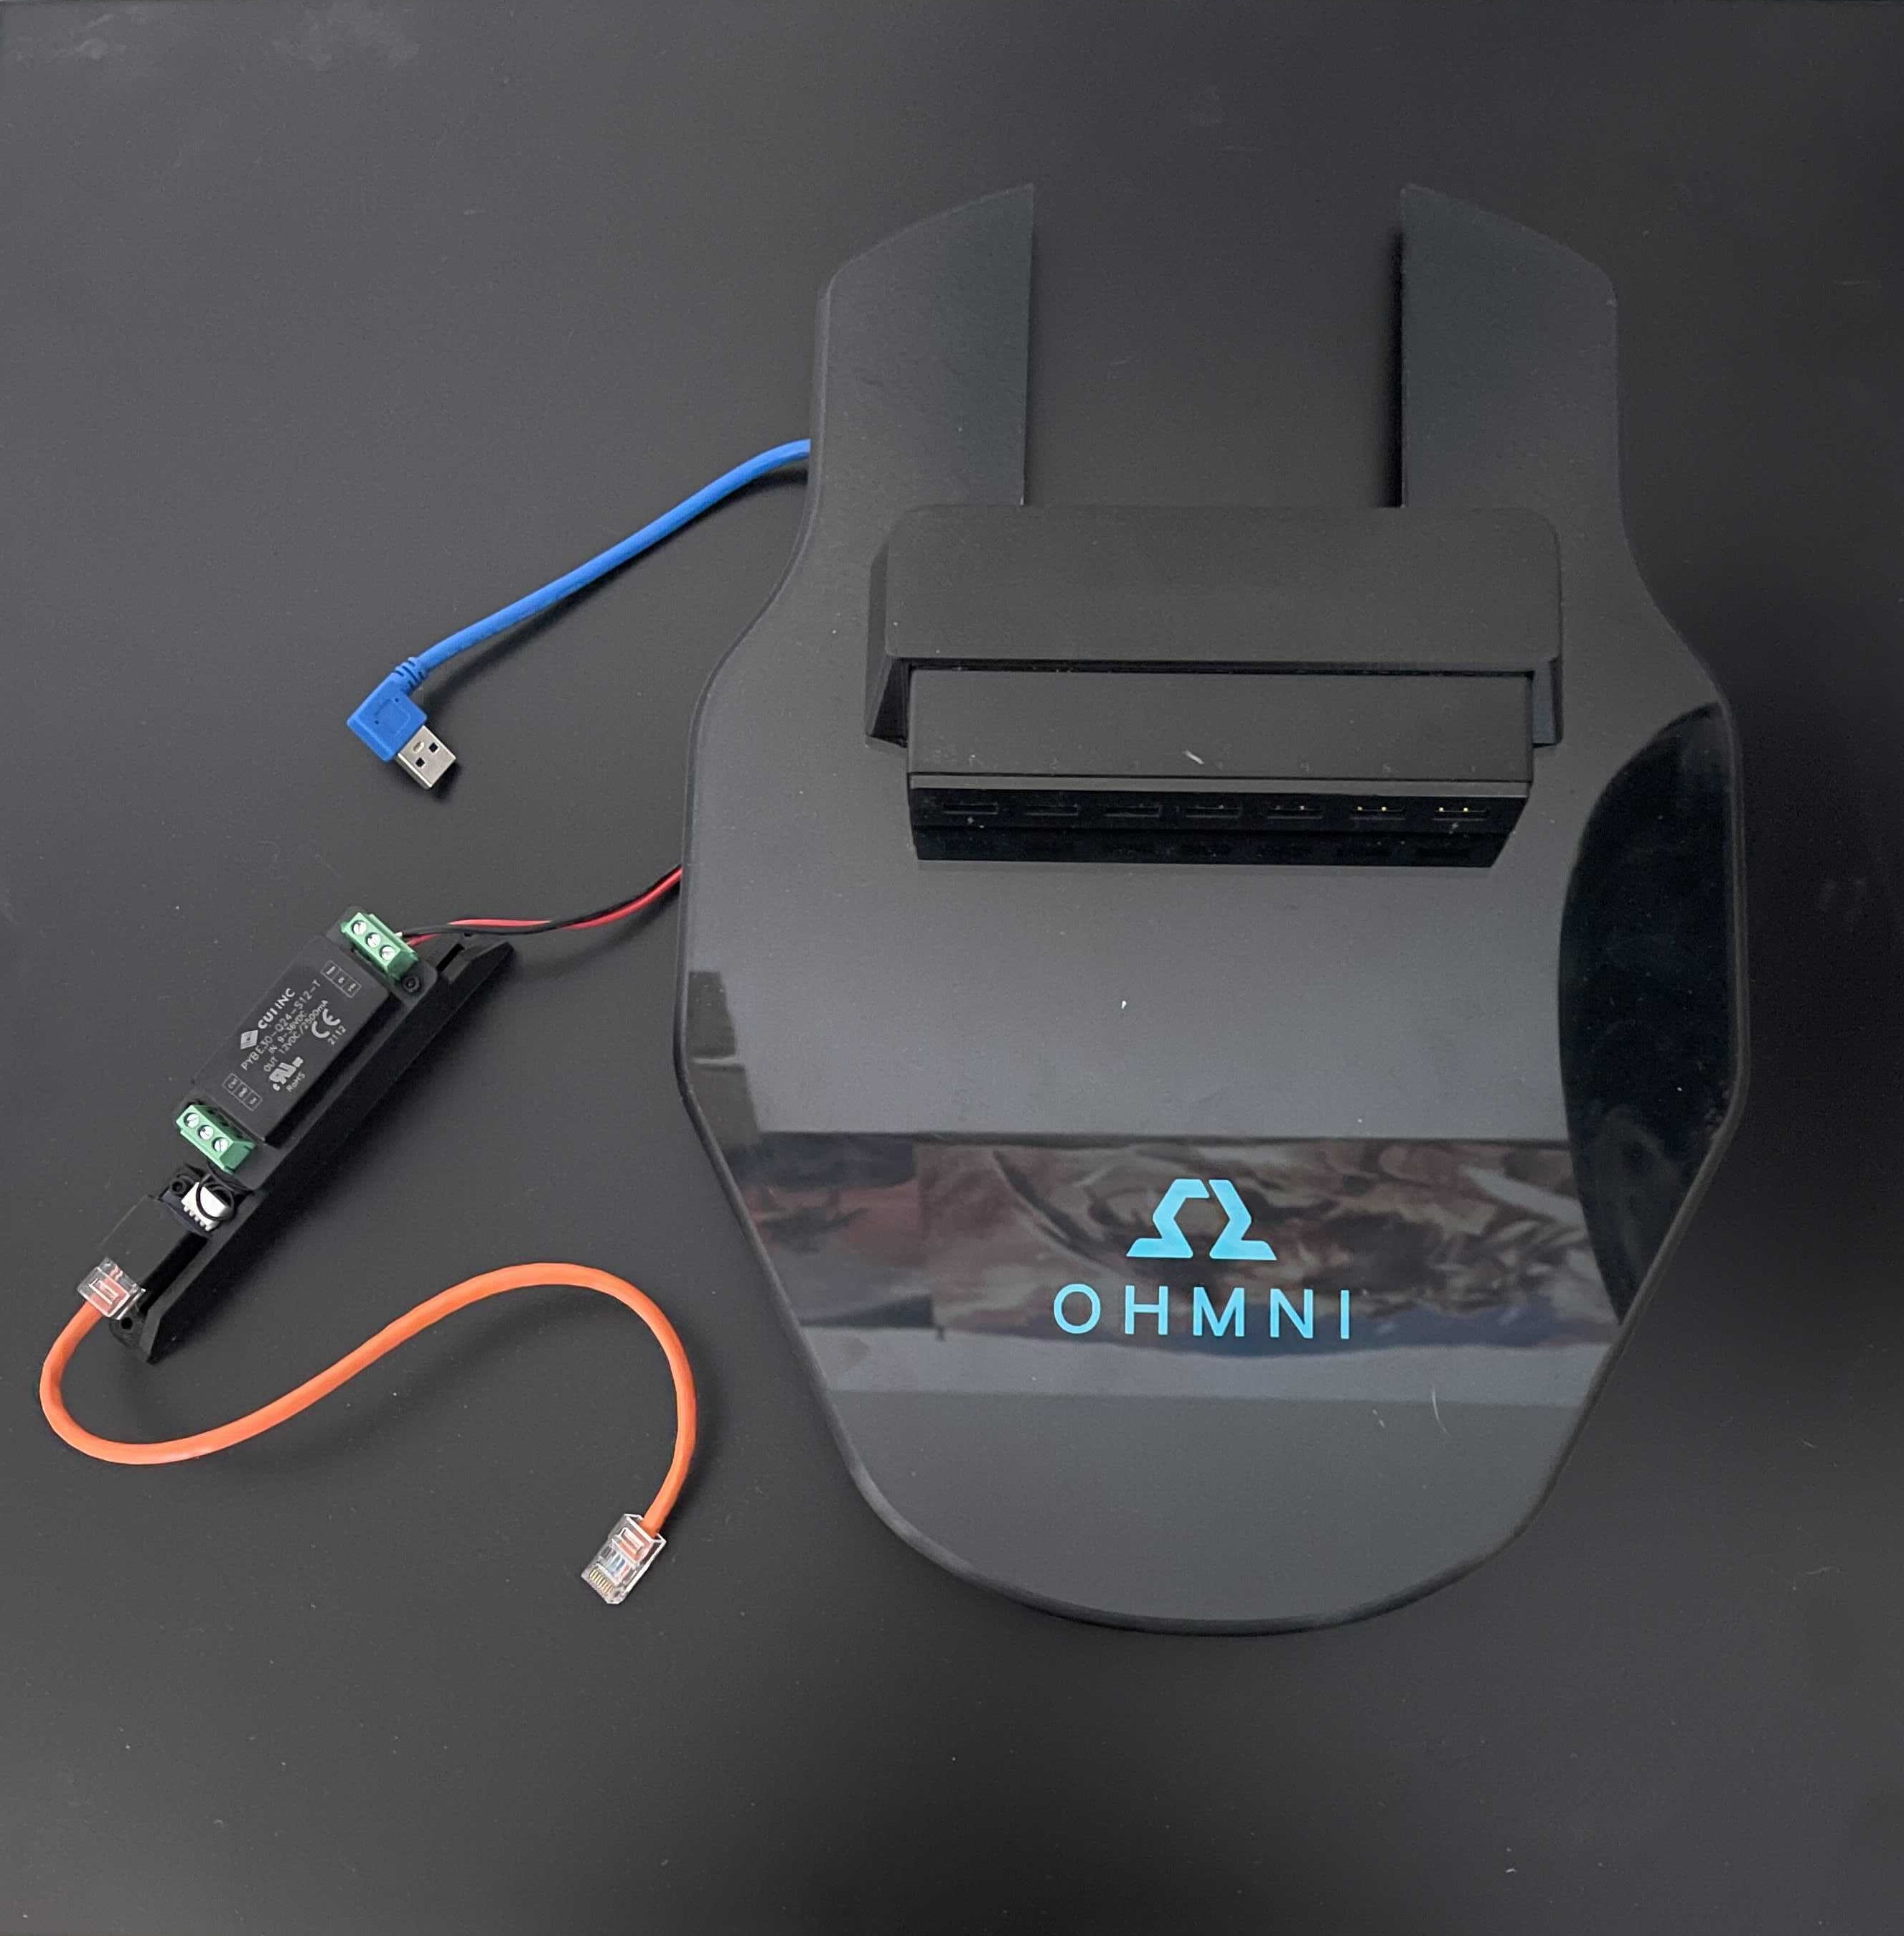
Here’s how to install your Ohmni USB Expansion Kit. Your kit should arrive partially assembled, as shown below:
Please Note: The USB Expansion kit is not available on Ohmni Gen 13 or higher (PVT 5000+)
Step 1. Make sure Ohmni is turned off
You must make sure Ohmni is turned off during this installation. Failure to do so could cause damage to Ohmni’s electronics and is not covered by warranty.
Step 2. Mount the power module
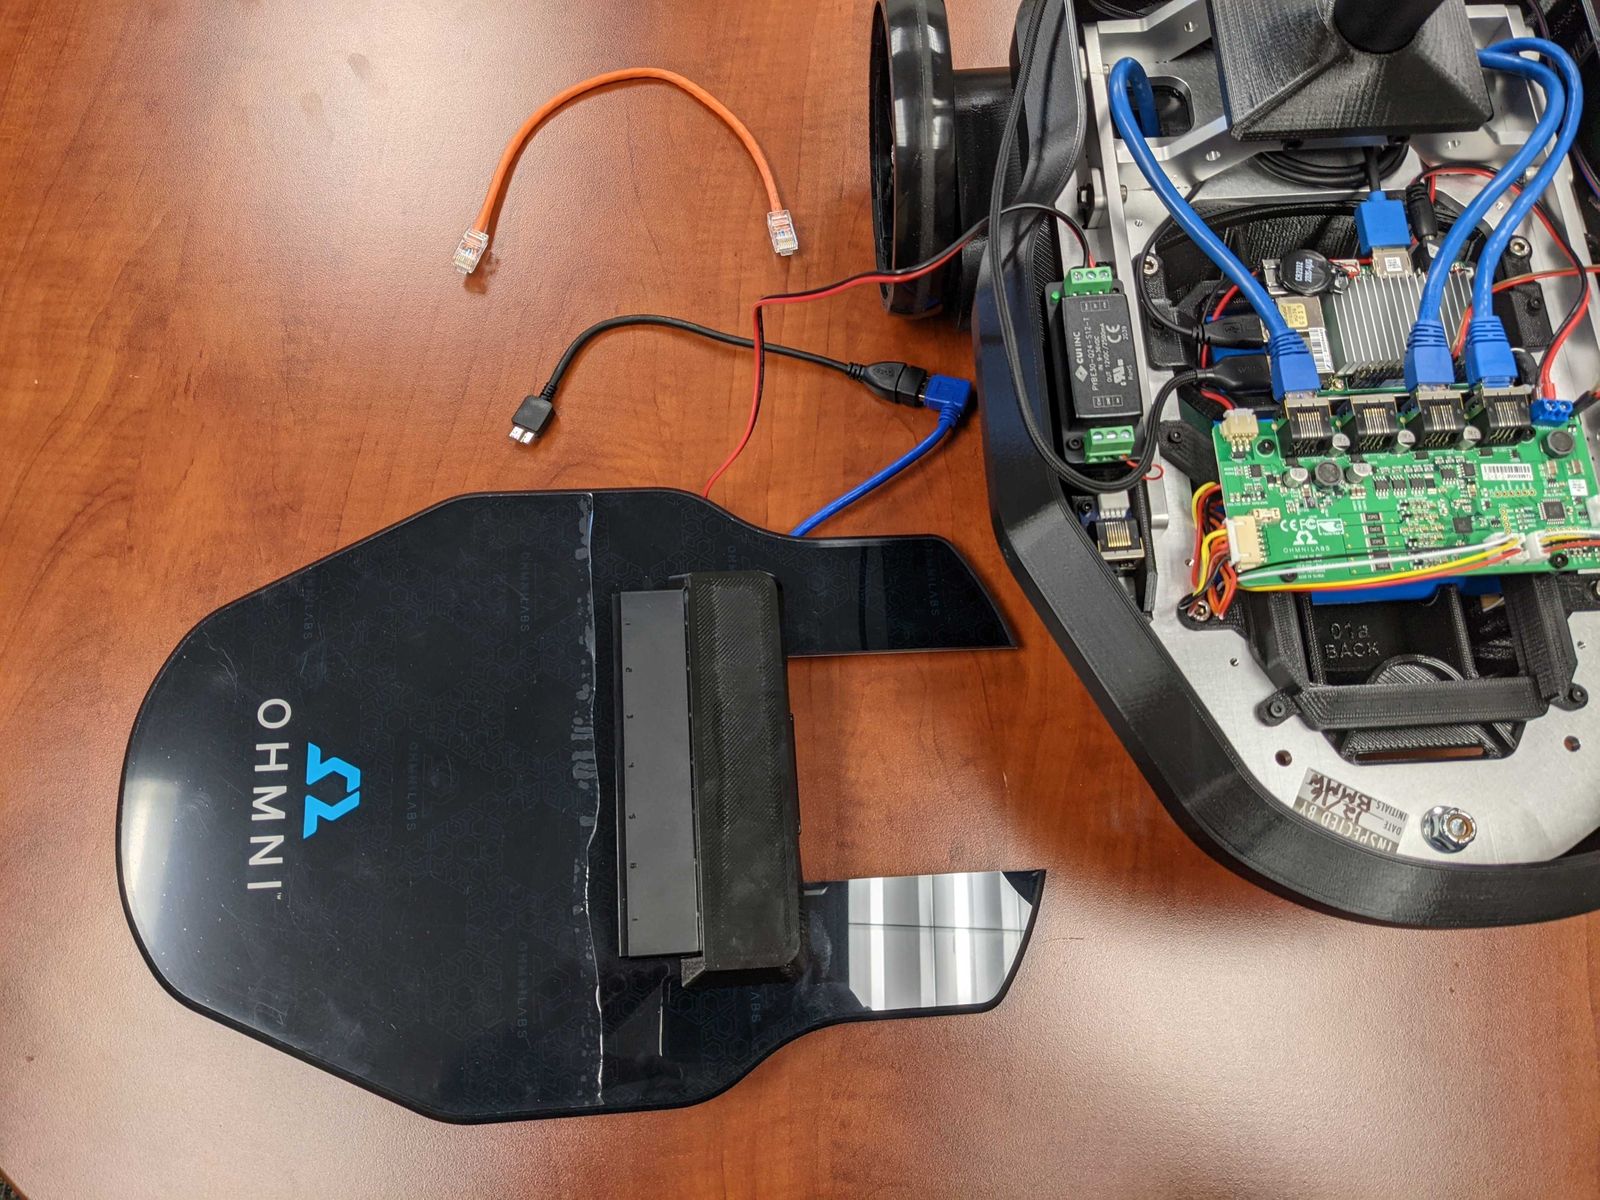
Use the linked guide to: Remove your existing Ohmni’s top.
Place the new top to the left of the robot so that the wires can reach.
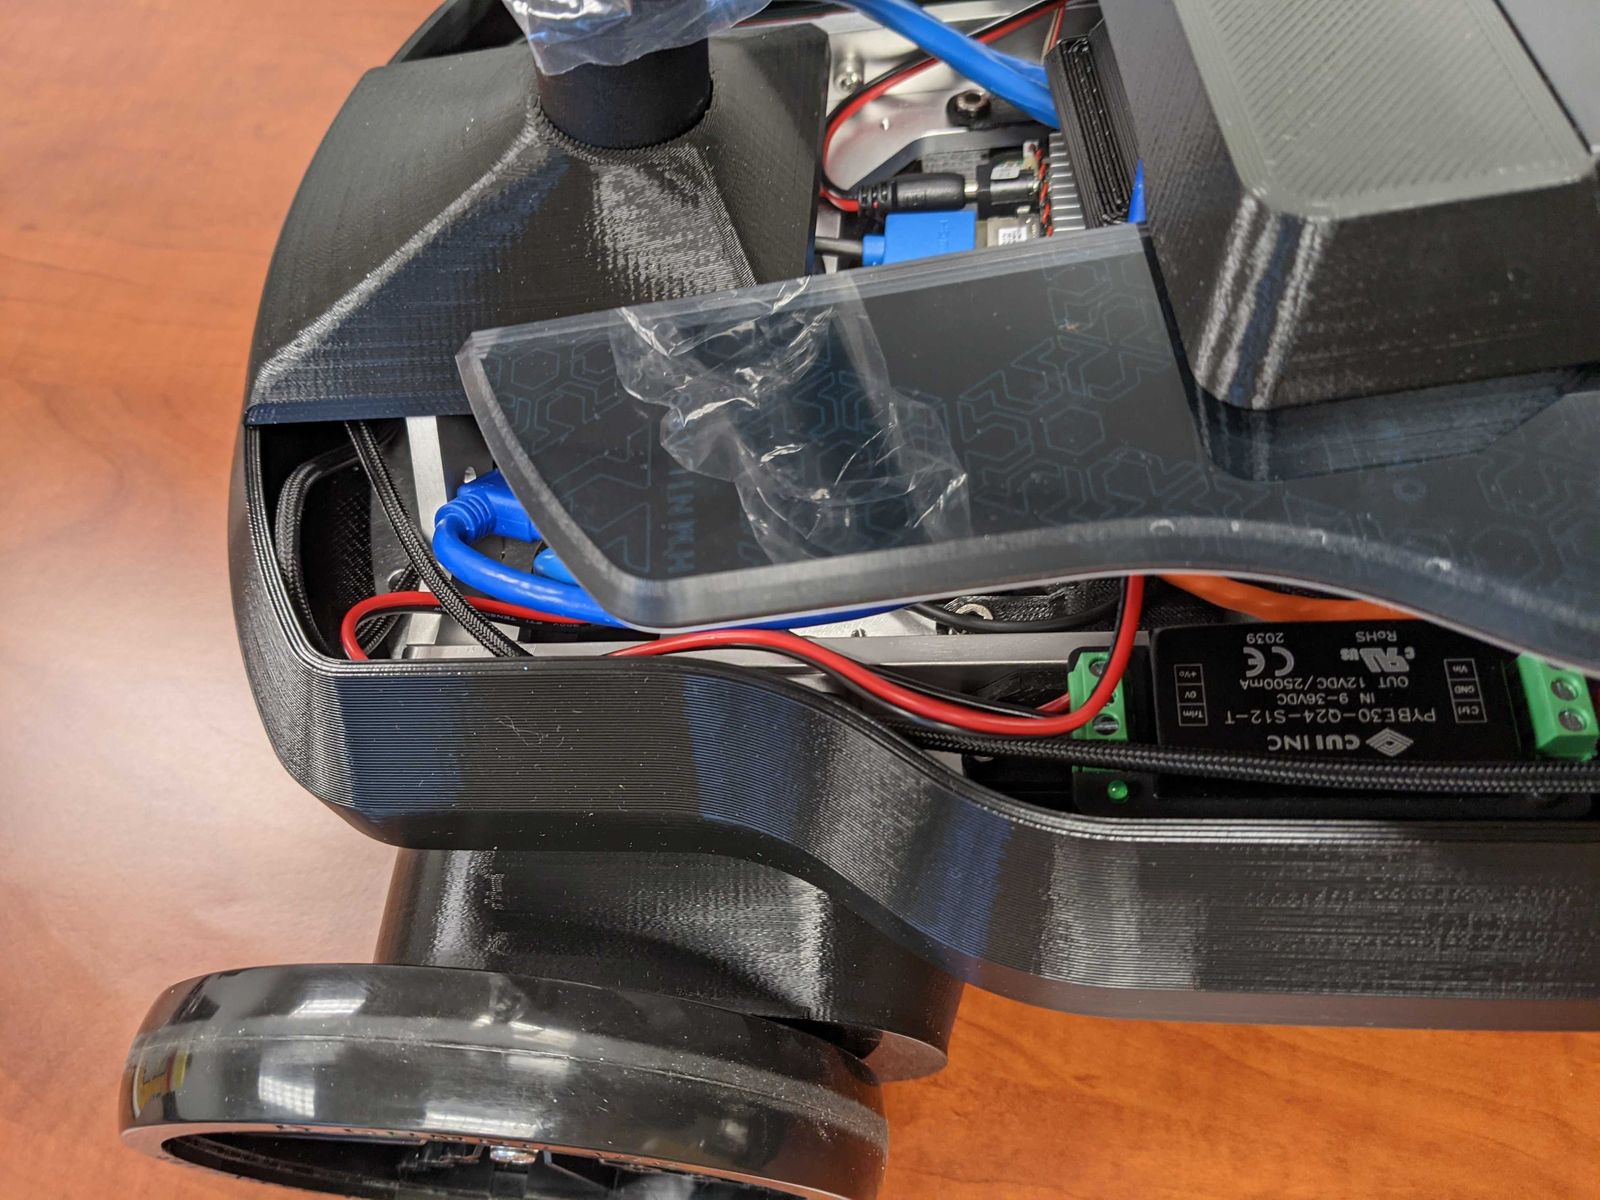
Remove the orange ethernet cable from the power module. Lift up the nylon braided cable running along the left of the robot and put the power module in place under it. Be careful not to pinch or crush any cables.
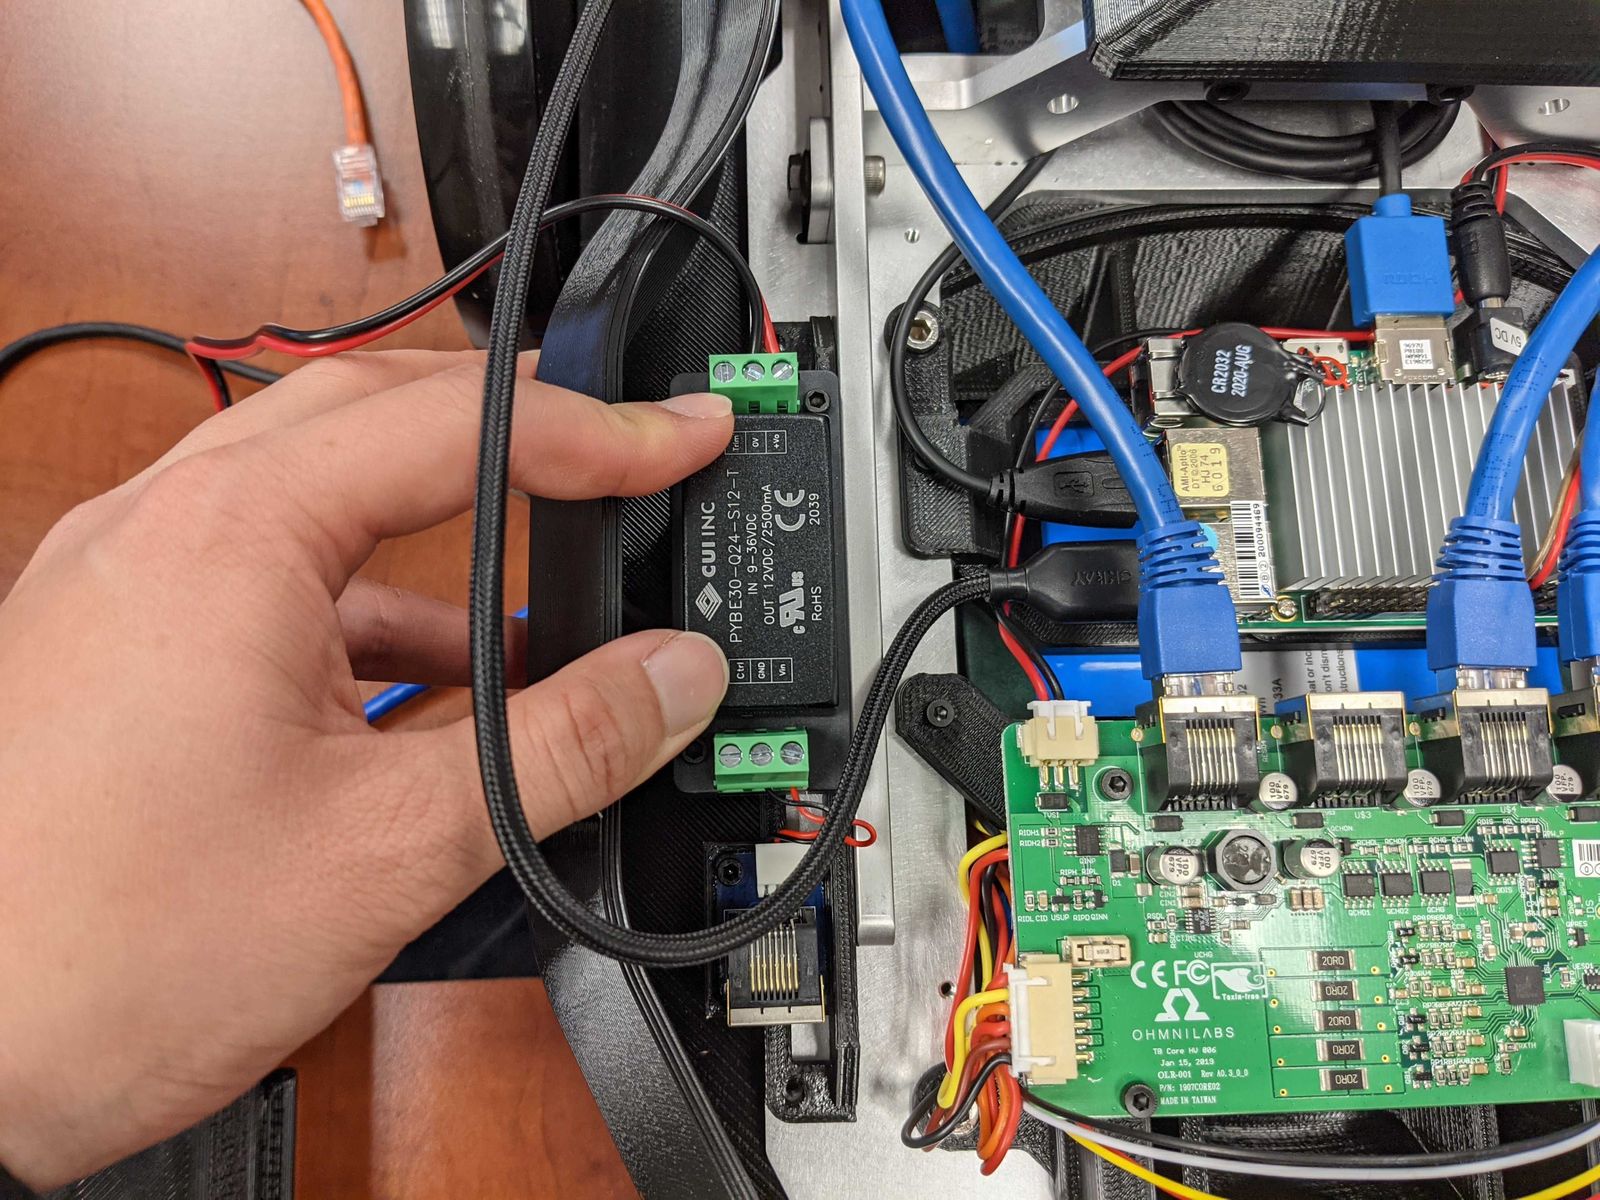
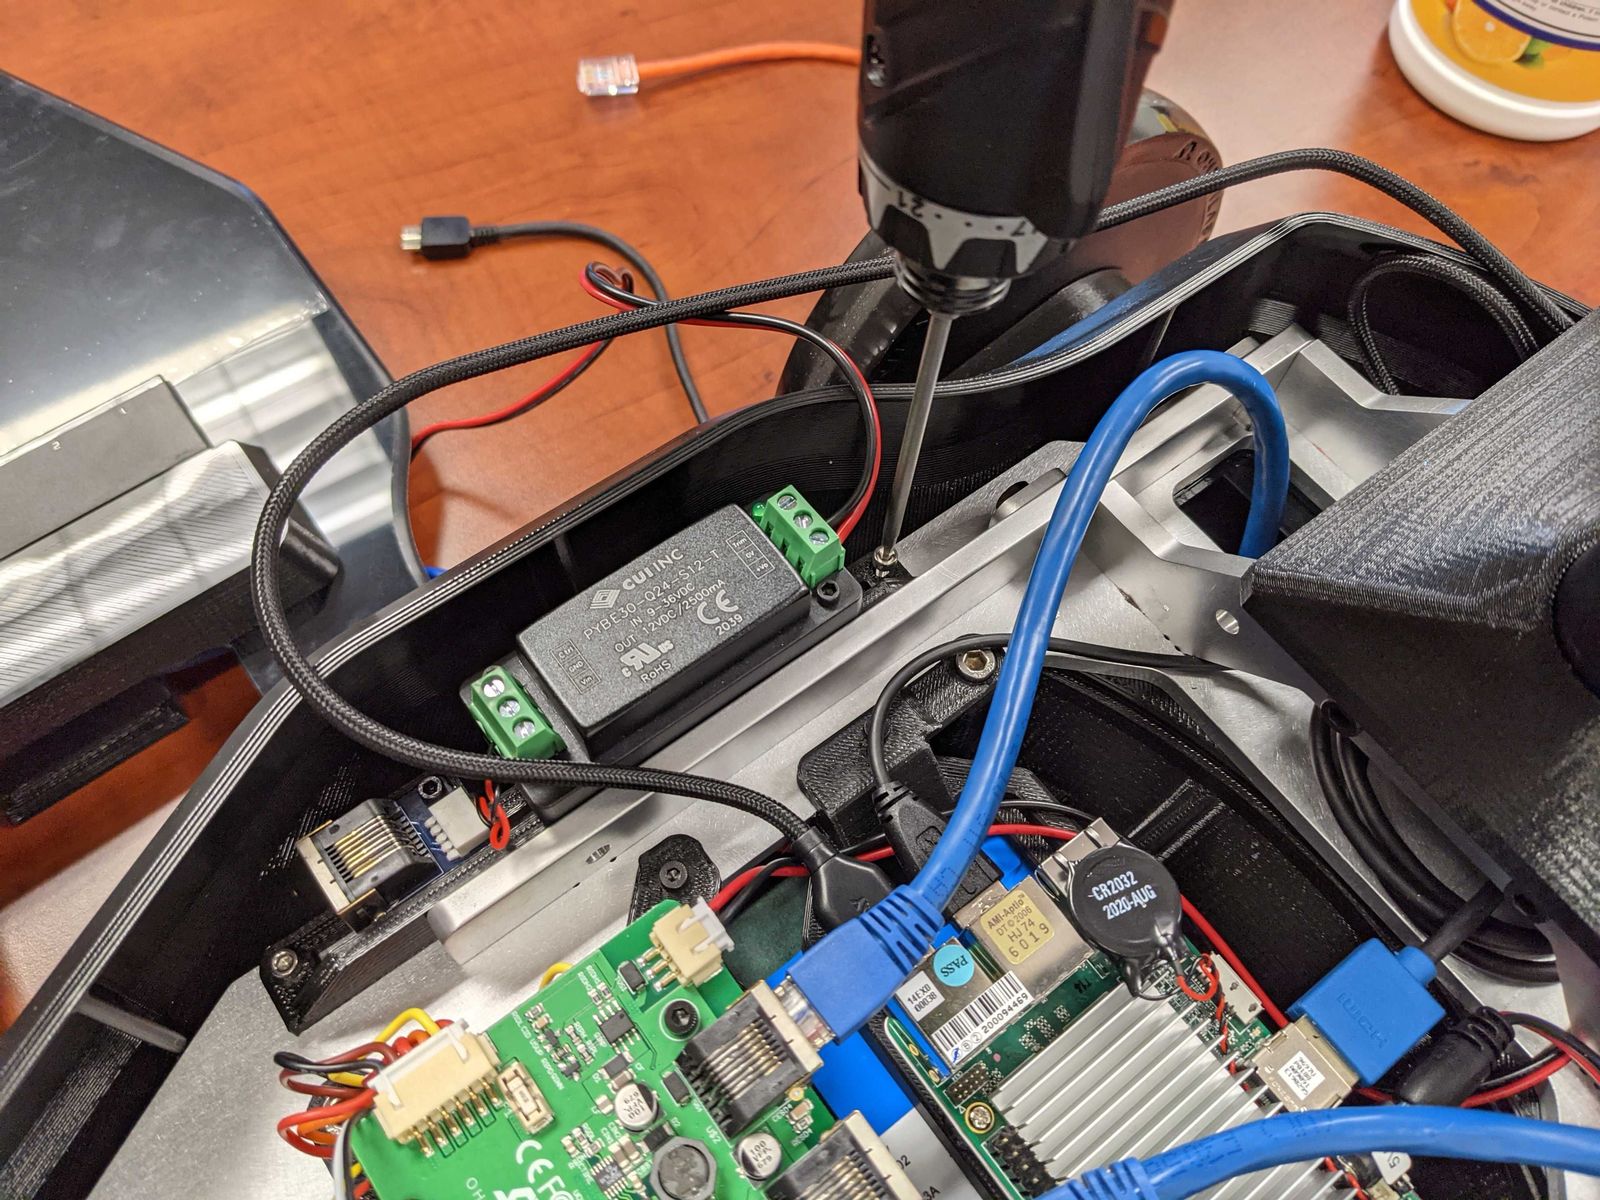
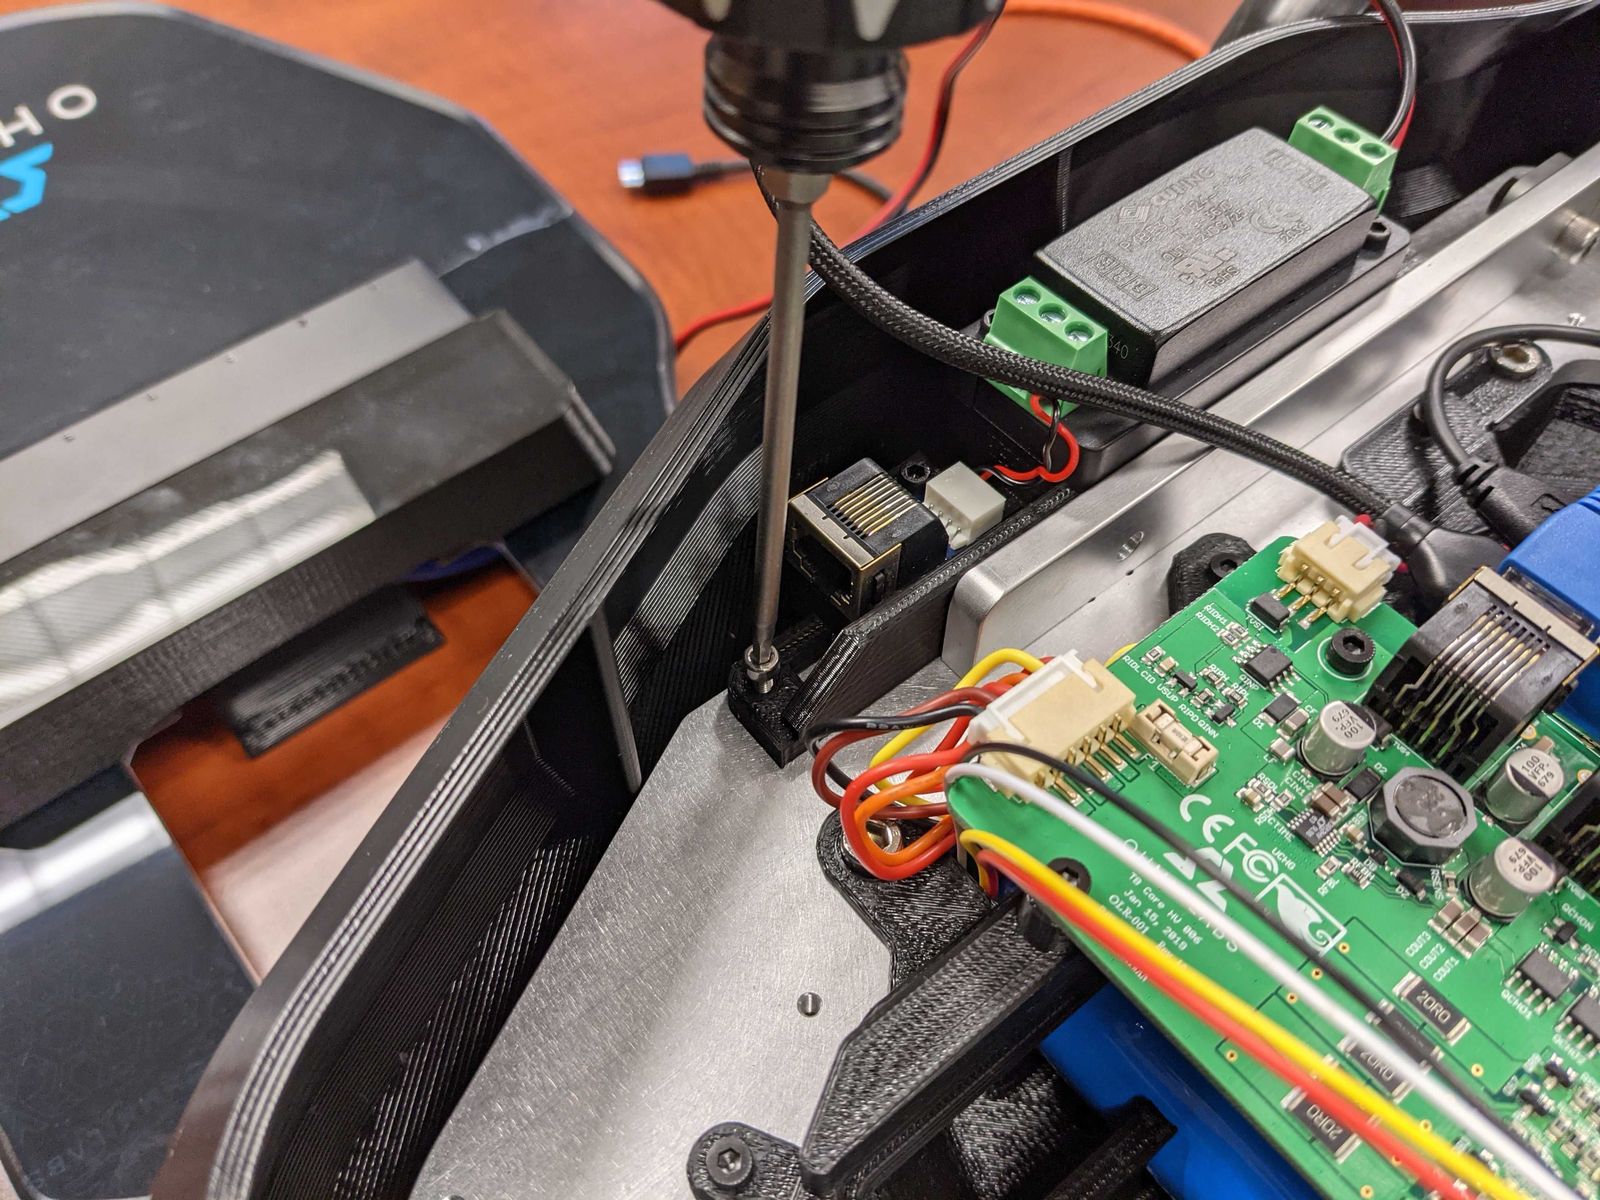
Now using the provided M3 screws and hex key, fasten the 2 screws that hold the power module to the aluminum plate:
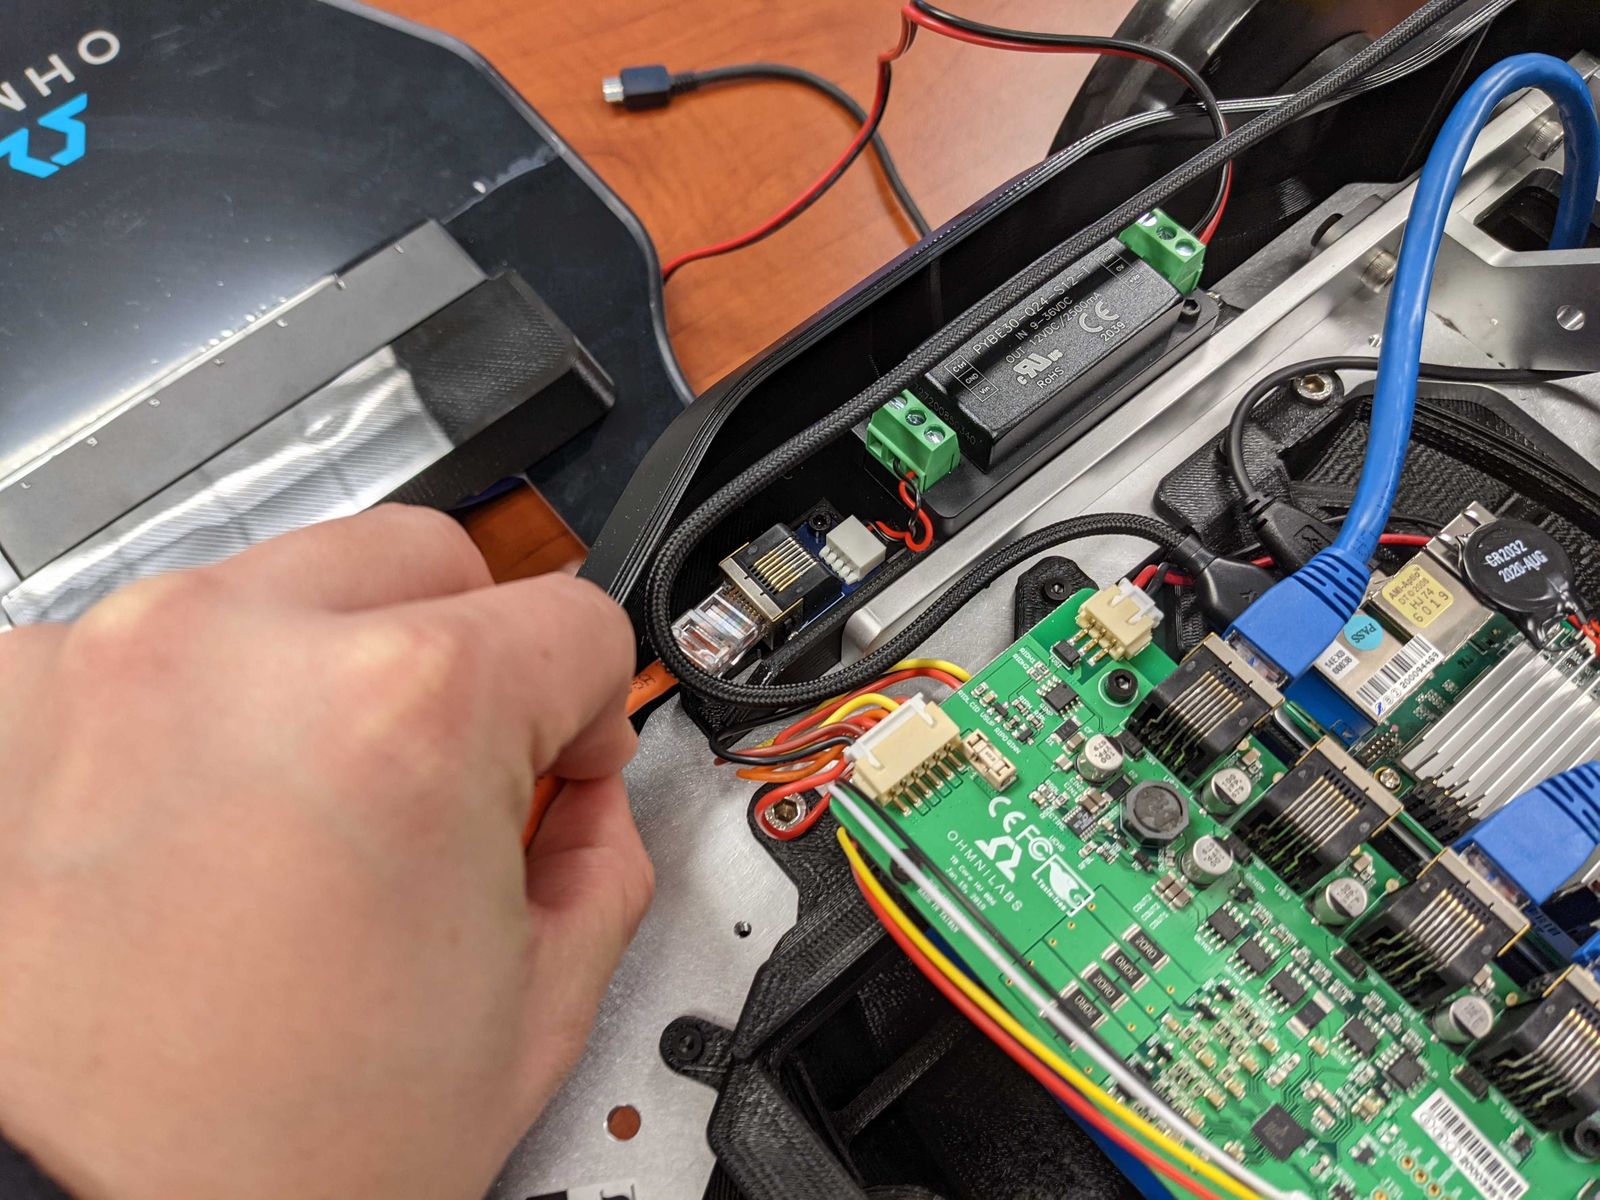
Step 3. Connect orange ethernet cable
Next, plug in the orange ethernet cable into the power module as shown below. The fit is intentionally tight to make sure the cable is retained well:
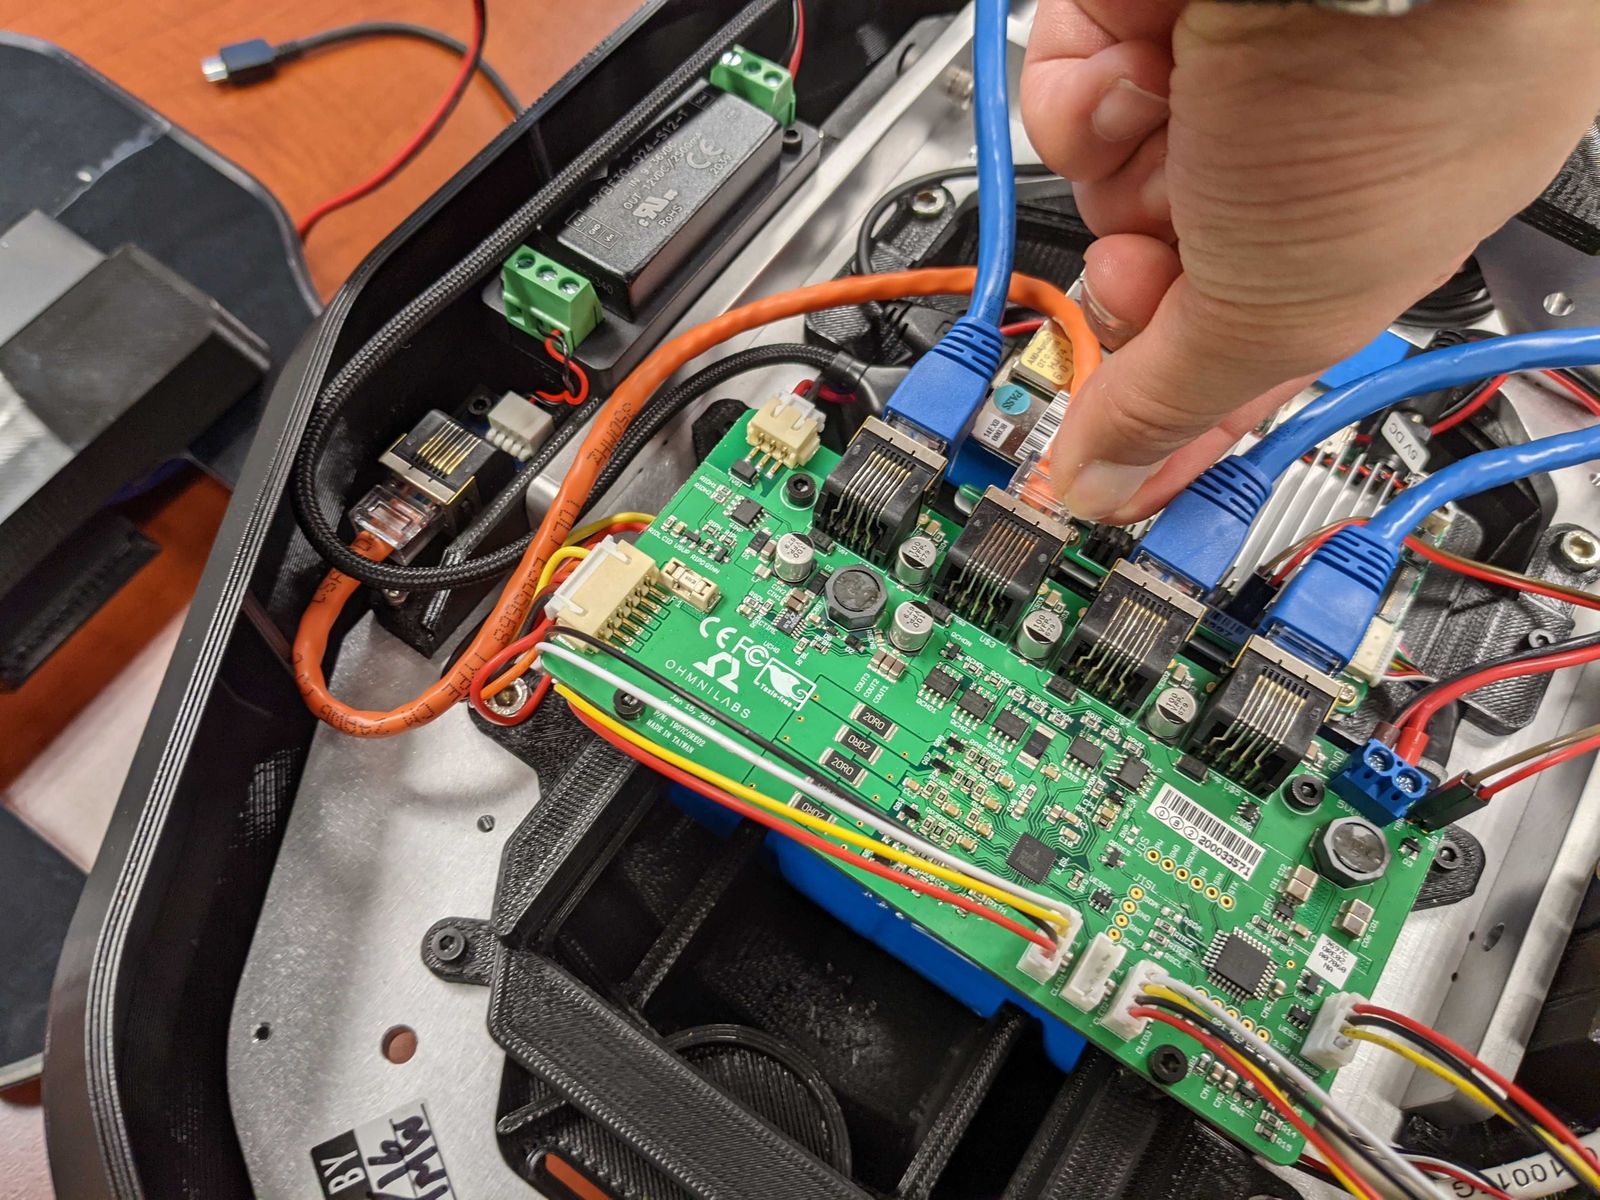
Now thread the cable UNDER the left blue ethernet cable:

Bend it back and plug it into this ethernet port on the core board:
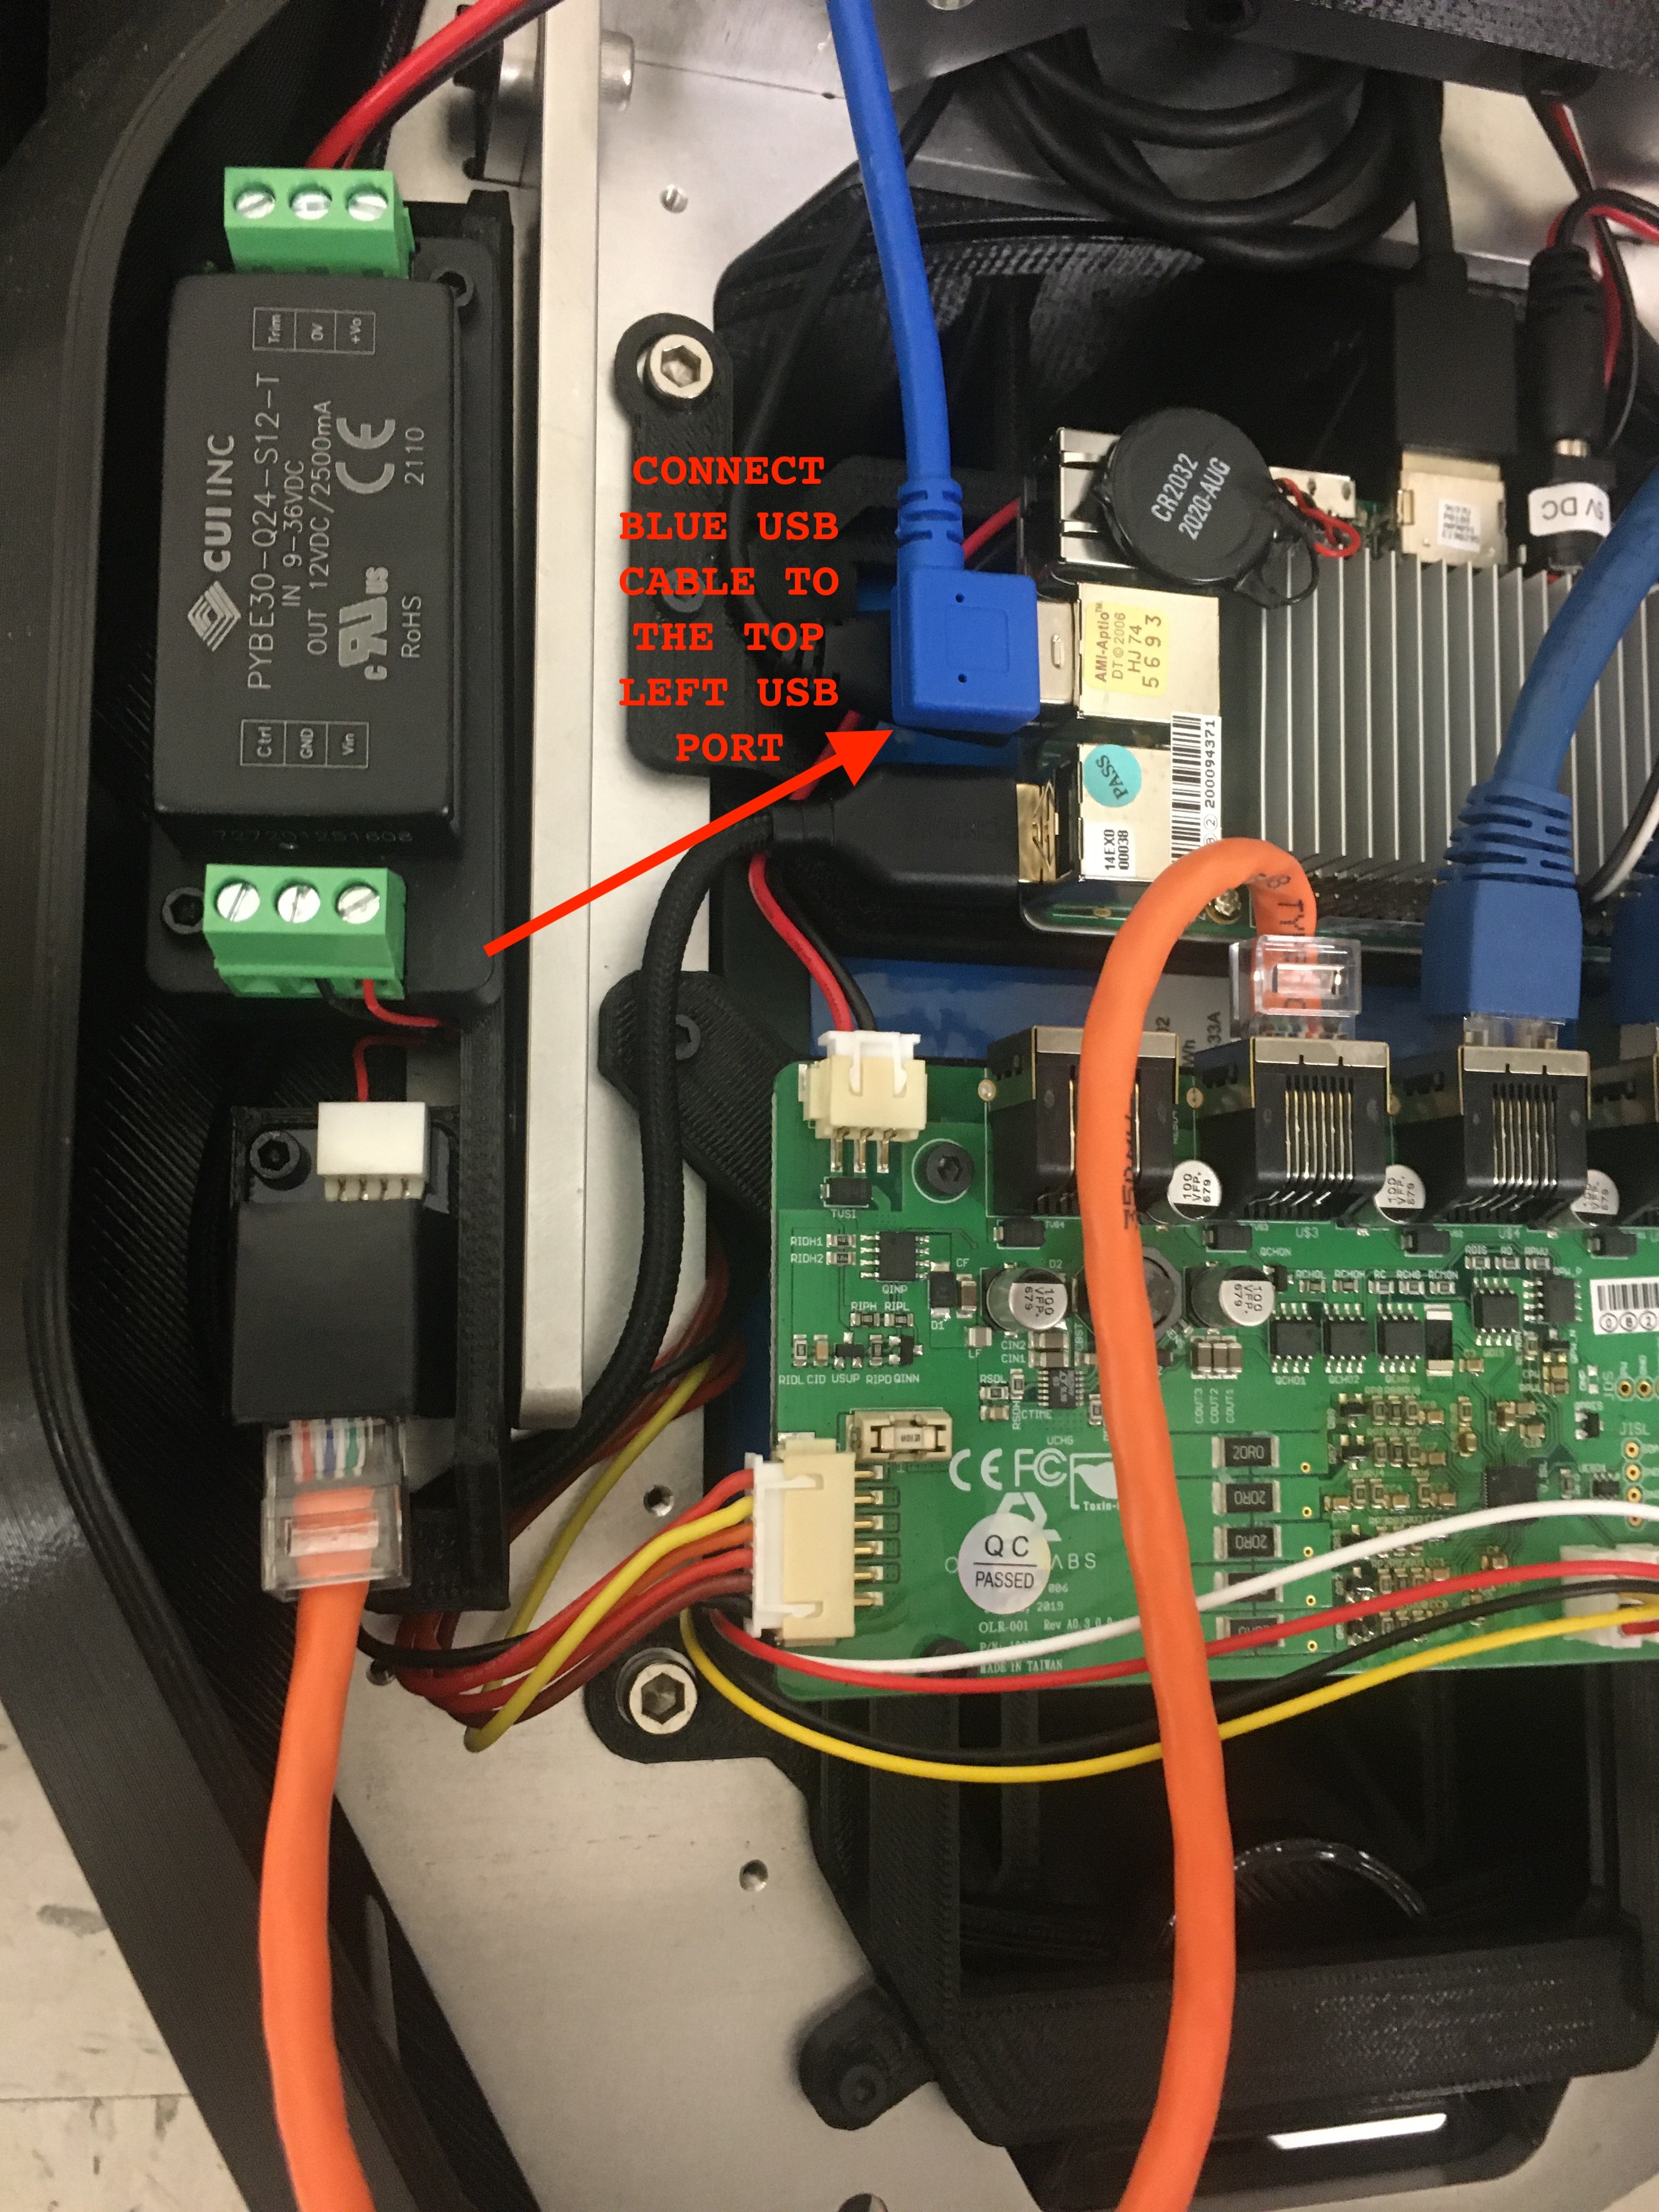
Step 4. Connect the USB plug
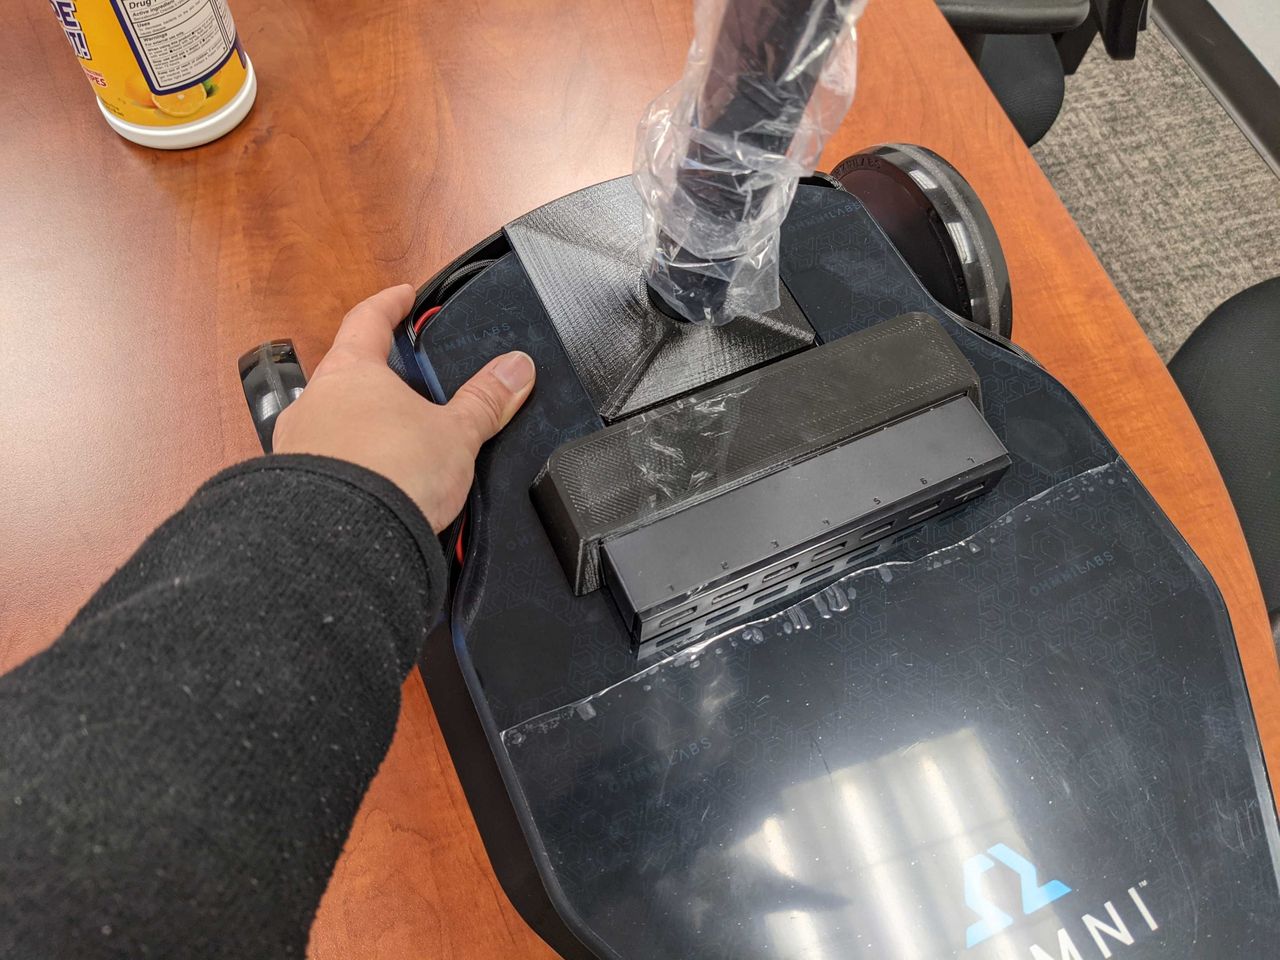
Now place the cover at the rear of the robot so that the USB cables can reach the main board. Carefully align and plug in the USB plug into the top-left port of the main board. Be careful not to insert it at an angle or you could damage the main board.
Step 5. Arrange cable slack in the top left of the unit
Now move the lid closer into position and tuck/arrange the cables in the top left area of the robot to make sure they will not get pinched when you close the lid.
Step 6. Secure the lid
With the cables arranged, place the new top about half an inch down from its final position and push it down flush against the base. Then slide it up to lock it in place. Fasten from the bottom with the two M5 screws from your original base.

Step 7. Power on
You’ve successfully installed the USB Expansion Kit. Power on the unit and enjoy!
Comments
0 comments
Article is closed for comments.