
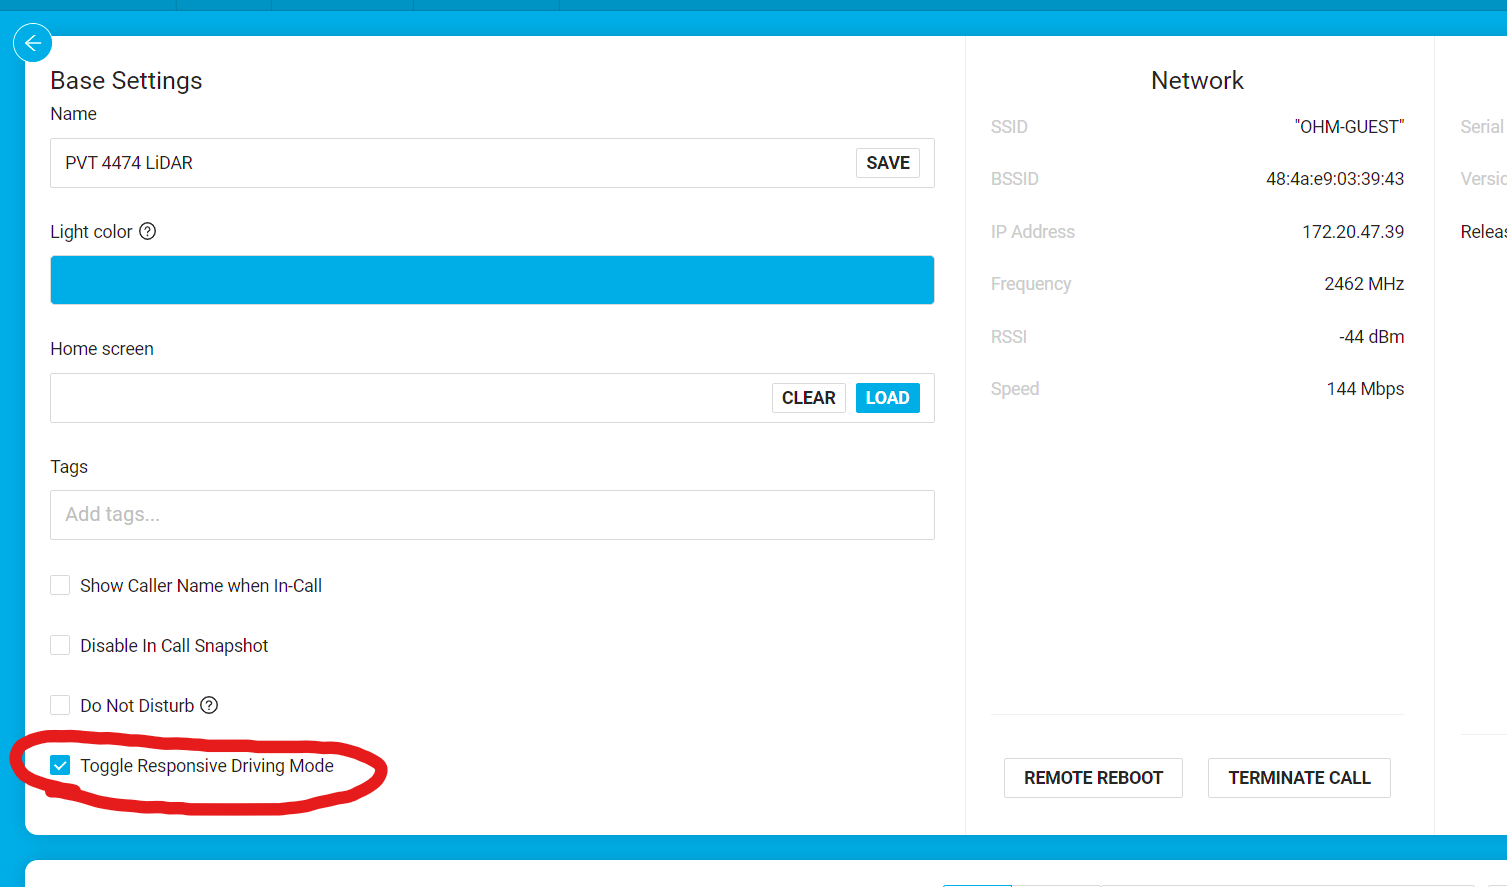
With Responsive Driving Mode (RDM) turned on for your Ohmni Robot, the driving interface will be modified to allow driving through the Responsive Driving Mode.
In this layout, the downwards facing camera of your robot will be placed at the bottom of your screen, and the UI is refreshed to accommodate this change.
Please see Item #18, for details on the Responsive Driving Mode available in this layout.
The Layouts are as shown below:
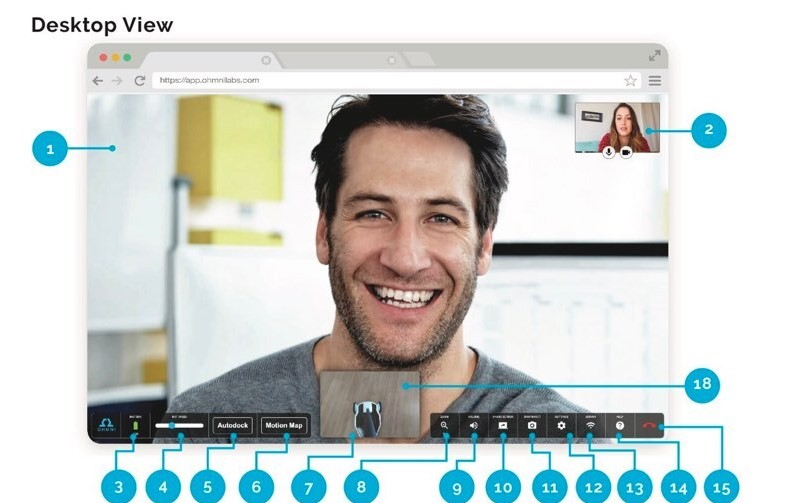
For Desktop Users
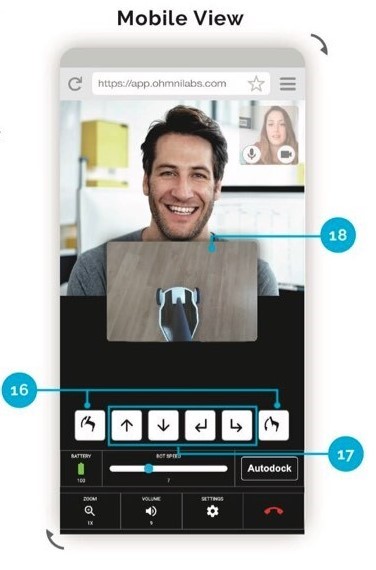
For Mobile Users
A legend of the UI is seen as follows:

1. Main Camera View
This view is Ohmni’s primary camera. This will show you the environment the Ohmni is in as if you were physically there yourself.
2. Webcam View
The Webcam view located in the top-right corner, is your local webcam. This view is also displayed in the same aspect ration as the Ohmni's screen. What you see in the corner is exactly what the audience is seeing on your Ohmni. Below the web camera, are microphone and camera icons that control the audio and video from your device respectively.
3. Battery & Charging Status
This icon will show an approximate live level of the Ohmni's battery. If the battery level jumps down after a lot of movement remain still work a second or two and the level should equalize to an accurate reading.
4. Speed Control
Each Ohmni has the ability to adjust its speed during a call from between around 0.1 and 2.0 mph. All Ohmni's will default in at a bot speed of 100, or about 1 mph, which is a good starting speed. If there is a lot of obstacles in the environment we recommend remaining close to the 100 settings. If you are in a wide-open area and want to cover the distance faster speeds around 200 can be helpful but are not recommended if there are obstacles around.
5. Ohmni Autodocking
Autodocking is a feature that when activated within around 3 feet of and facing Ohmni's charger Ohmni will navigate itself to its charger.
6. MotionMap
Motionmapping is a feature that allows users to control Ohmni using their mouse (wired/wireless) or laptop trackpads. Doing so allows users to do much more dynamic motion controls and use their mouse as a joystick.
When you are ready to dock, or end the call and stop motionmapping hit the ESC key.
7. Navigation Camera
The Navigation Camera View, located in the bottom of the screen, is Ohmni's downward-facing camera. This camera will help you to see where Ohmni is in relation to other objects in the environment. This is great for navigating crowded floors, and seeing where obstacles are.
8. Zoom
Ohmni Supercam, or Supercam Camera Developer Editions
When clicking the magnifying glass users will activate SuperZoom. Please read more here.
9. Robot Volume
Clicking on the sound icon will allow users to adjust the volume their voice is being projected over the Ohmni.
If your audience is having trouble hearing you, you can try turning up the volume. If you are at max volume you can also try using headphone that has a microphone. Moving the microphone closer to your mouth will greatly improve the audio quality.
10. Screenshare (Chrome Only)
Click on this icon to share a screen from your device to Ohmni's display. You can choose to just share a window, screen, or choose to include audio as well. This feature is only currently supported through Google Chrome.
11. Snapshot
The camera icon will activate the ability to take a 13-megapixel image on your Ohmni Supercam. Read more about Snapshot here.
12. Advanced In-Call Settings
The gear icon will open advance in-call setting for your Ohmni. This is covered in this article.
13. Call Quality Icon
The WiFi icon will bring up a live diagnostic of the user's wireless networks current readings. This can be very helpful if users are experiencing odd freezing, call quality drops, and more.
14. Help Guide
Press the help guide to pull-up a document displaying the available controls to your Ohmni Interface.
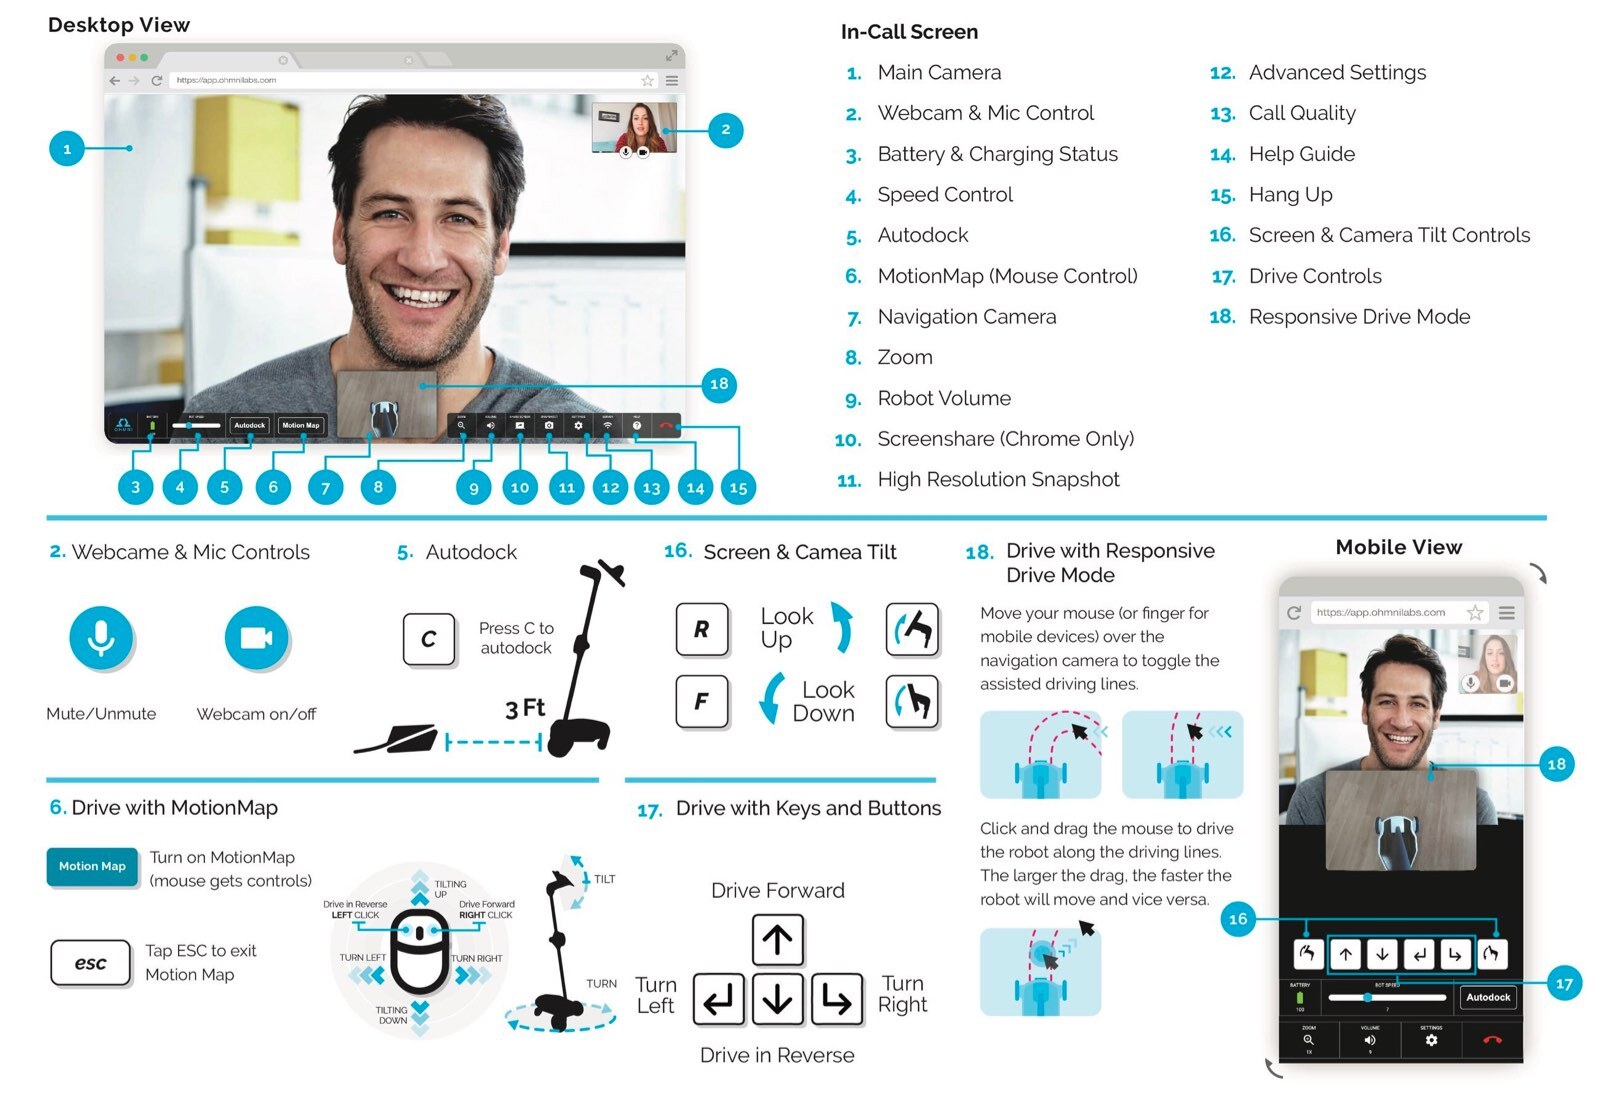
15. Hang Up
Press this button to end-the call with Ohmni.
16. [Mobile Only] Screen & Camera Tilt Controls
Use these virtual buttons displayed on your mobile device to move the tilt of Ohmni's head.
17. [Mobile Only] Drive Controls
User these virtual buttons displayed on your mobile device to operate Ohmni.
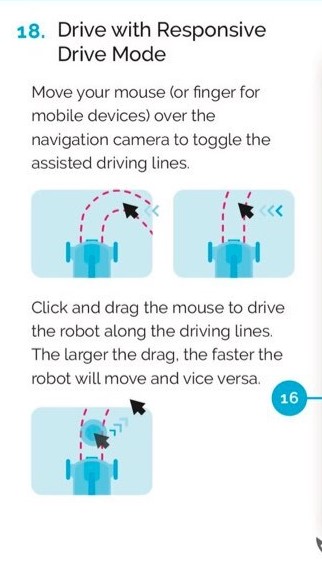
18. Responsive Driving Mode
Available in this driving mode, use your mouse, and/or finger for mobile devices, to directly drive Ohmni. By putting your cursor on the navigation camera screen, driving lines will appear to indicate the direction of Ohmni movement.
Click on your desired location to steer Ohmni in that direction.
Comments
0 comments
Article is closed for comments.