
Now that you are connected to your Ohmni, its time to start driving! Take a look at the information below to understand more about the driving experience with Ohmni.
-
What are we looking at?
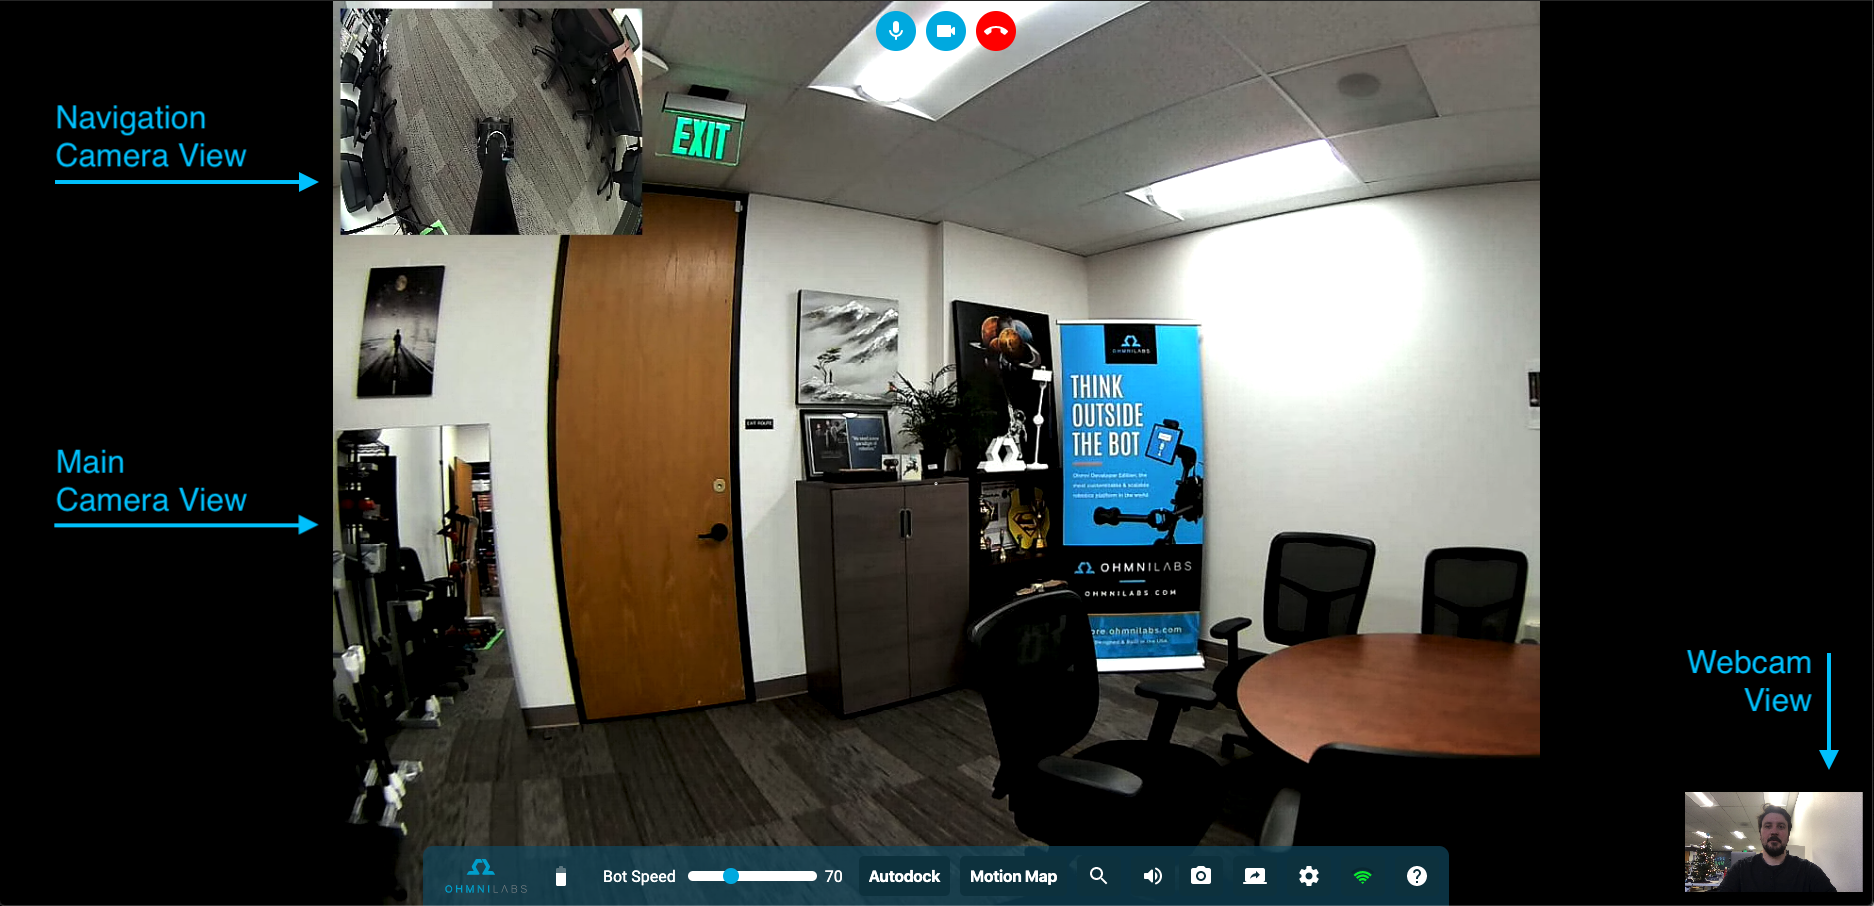
The Main Camera View is Ohmni’s primary camera. This will show you the environment the Ohmni is in as if you were physically there yourself.
The Navigation Camera View, located in the upper left corner, is the Ohmni's downward-facing camera. This camera will help you to see where Ohmni is in relation to other objects in the environment. This is great for navigating crowded floors, and seeing where obstacles are.
The Webcam View, located in the bottom right corner, is your local webcam. This view is also displayed in the same aspect ration as the Ohmni's screen. What you see in the corner is exactly what the audience is seeing on your Ohmni.
-
We are ready to start Driving
For PC or Laptop controls:
Use the arrow keys to move forward/backward and turn left/right.
- You can also use the W, A, S, and D keys.Use your Mouse and click inside the main camera view to look up, down, left or right.
- Or use the R key to look up and the F key to look down.
-(A trick to remember: R for Roof and F for Floor)For Mobile device controls:
Use the on-screen arrow icons to move forward/backward and turn left/right.
Use the icons that look like Ohmni's tablet to tilt the camera view up and down.
Forgot the Instructions?
Ohmni's driving instructions are always visible in the toolbar. Click on the question mark icon (?) in the bottom right corner of the toolbar to see the instructions. Read more about the toolbar in the next section. - What is MotionMap?
While we recommend using the arrow keys on your device to drive Ohmni in the beginning, you can also use your mouse/trackpad to control Ohmni through a control scheme called: MotionMap.
Try MotionMap by:
1. Clicking on the MotionMap button in the toolbar.
2. Move your mouse, or finger on the trackpad, left or right to turn Ohmni left or right.
3. Move your mouse, or finger on the trackpad, up and down to tilt Ohmni's tablet up and down.
4. Left-click your mouse or trackpad to move forward.
5. Right-click your mouse or trackpad to move backward.
6. When you are ready to stop MotionMap or need to access a different setting hit the "ESC" key to exit. - What is Autodocking, and how to do it?
To keep Ohmni's charging dock small and moveable, we gave Ohmni the ability to recognize its charging dock and park itself. To start autodocking, follow the steps below:
1. Drive Ohmni to within 3 feet of the dock, facing it. For best practice, make sure that Ohmni's charging dock is visible from the navigation camera and that you are facing the front of the dock.
Caution: Make sure there are no obstacles in the way. Ohmni won't be able to recognize them and might get in a sticky situation when trying to dock
2. Click the C key, or the "Autodock" button in the toolbar, and wait for Ohmni to dock itself.
3. Once Ohmni's successfully docks, there will be a lightning bolt in the battery icon at the left side of the toolbar to show that Ohmni is charging.
If you are having trouble getting autodock to work, please check out this article on common issues. - All Done? Here is how to end your call.
Before ending your call, make sure Ohmni is charging on the dock so that is is fully charged for its next visitor. If Ohmni is without its charger, it will go to sleep to conserve battery. You can read more about that setting here, How can I keep Ohmni from turning off?
Once your Ohmni is docked, click on the red phone icon at the top of the screen to end the call and return to the main screen.
If you are a visual learner like me, you can also watch this walkthrough video to see some of Ohmni's controls in action.
Now that you can control Ohmni lets learn more about all of the functions of the toolbar.
Comments
0 comments
Article is closed for comments.